
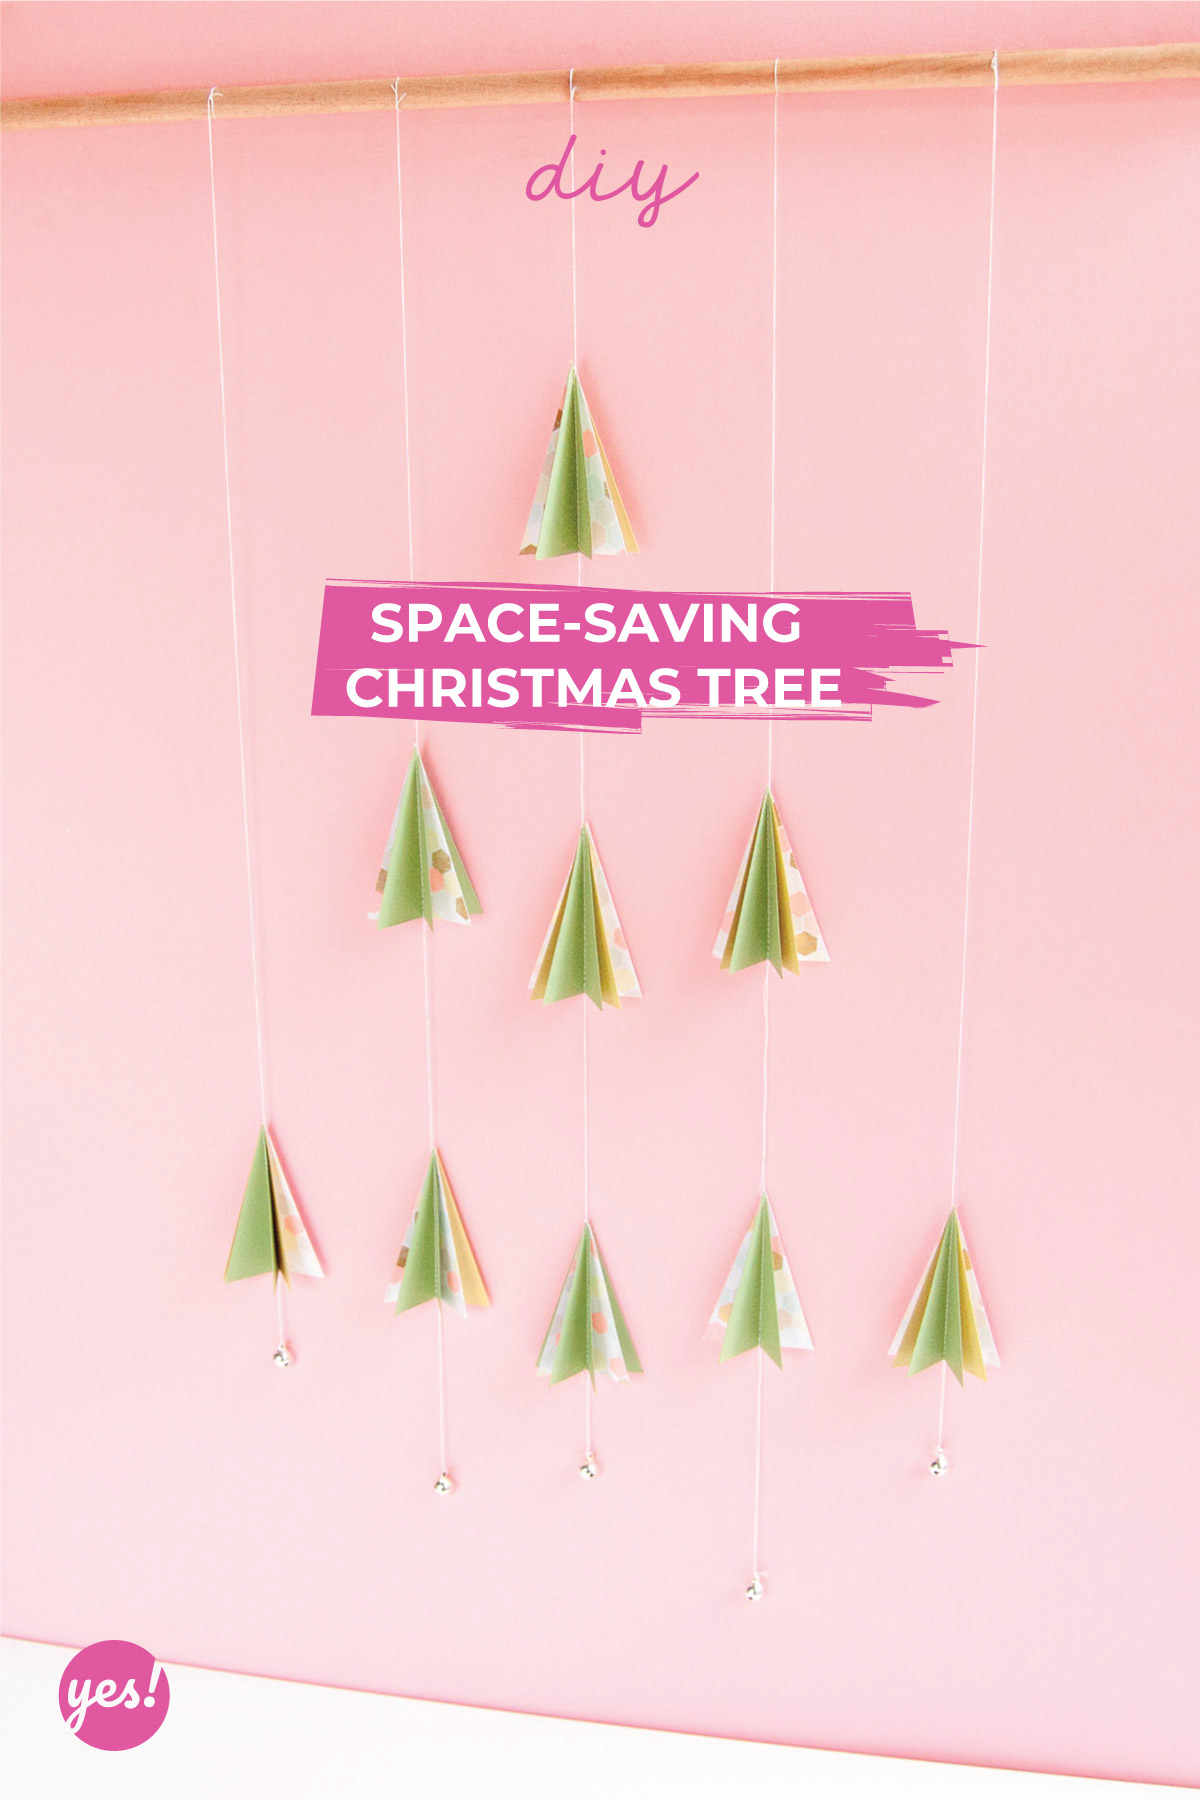
When you live in a small flat it can be challenging to find a place to put your Christmas tree. The last thing you want is having to circle around it all the time, right? But just because you don’t have the sq. feet doesn’t mean you can’t have the cozy Christmas feel in your home. You just have to get a bit more creative.
There are many ideas for how to make a space-saving Christmas tree on Pinterest out there. We’ve scrolled through all of them, but at the end decided to create a whole new yes! version.
Do you love our space-saving Christmas tree as much as we do? Get your crafty hat on and let’s start making!
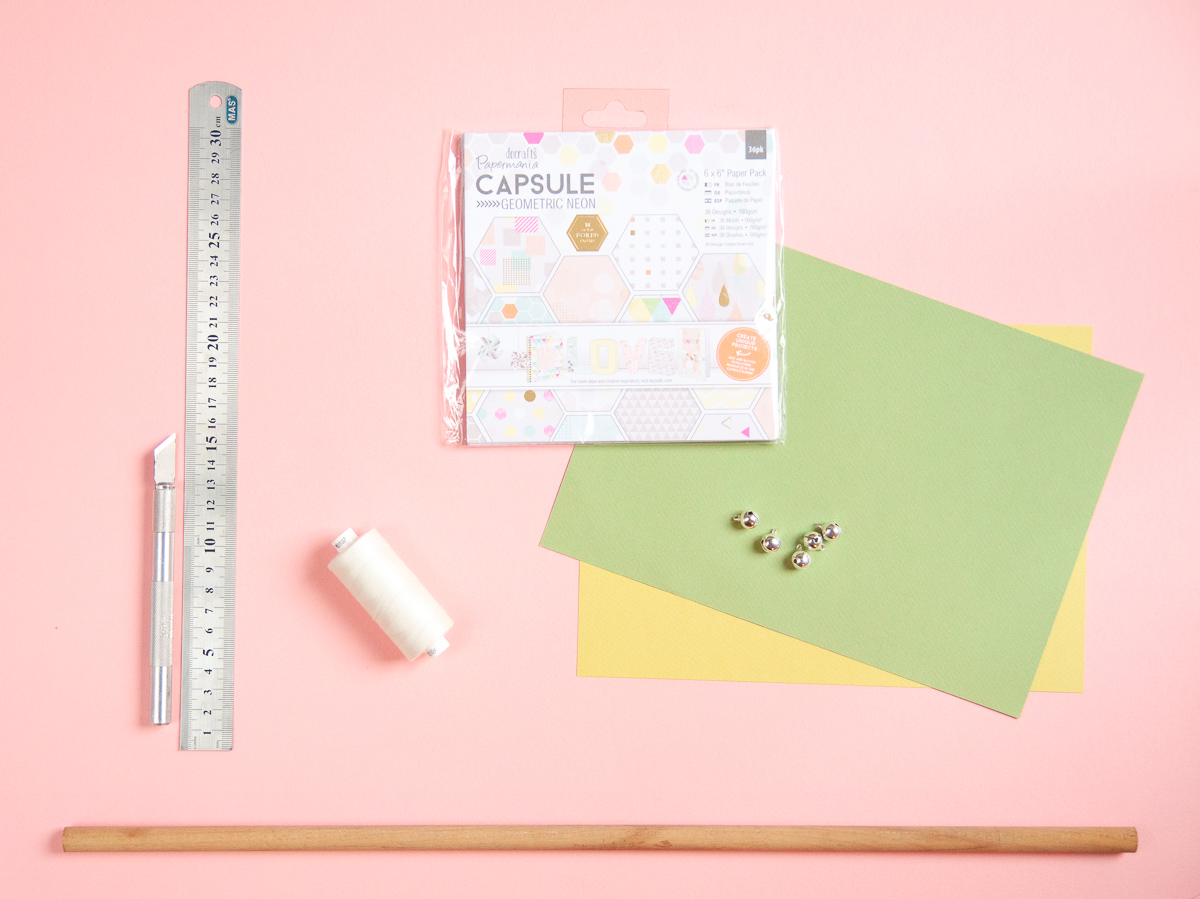

To make your space-saving Christmas tree you will need:
- colored cardstock paper (we used two shades of green)
- patterned scrapbook paper (we used the Papermania Capsule Geometric Neon – loove the colors and the gold accents!)
- white thread
- 5 jingle bells (1/2 inch diameter)
- a cutting ruler
- an X-Acto knife
- a sewing machine
Let’s make this!
First step: cut out the mini paper Christmas trees.
You will need 9 mini Chrismas tree and each is made of 3 layers of paper. This means you need 27 paper triangles, made of all of your chosen colors and patterns. We made 10 light green triangles, 10 dark green and 7 patterned for accents. The bottom side of our triangles is 2 inches and the height is 3 inches.
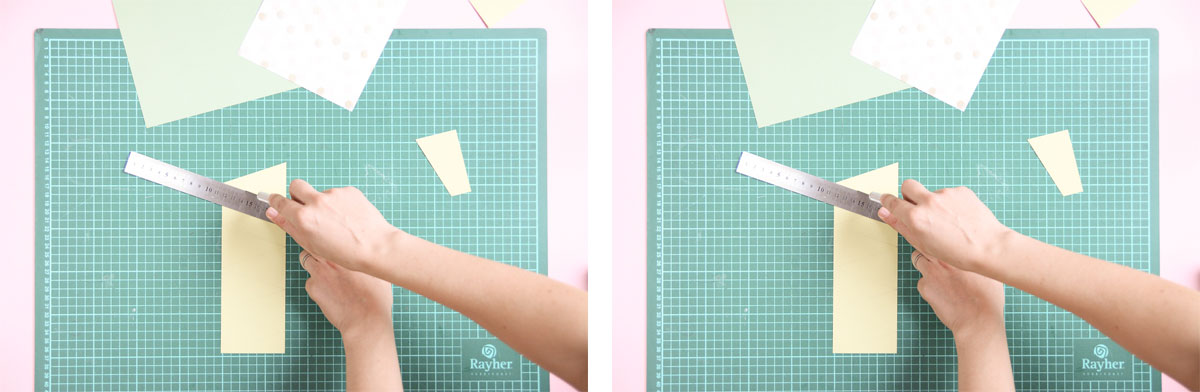
Draw your triangles on your papers and cut them out using the Xacto knife.
Second step: sew the triangles in a garland.
To make your space-saving Christmas tree you will need 5 garlands:
- One with 3 trees
- Two with 2 trees
- Two with 1 tree
Before starting to sew, always pull some thread out of the machine, so you have a few inches of thread at the beginning of the garland.
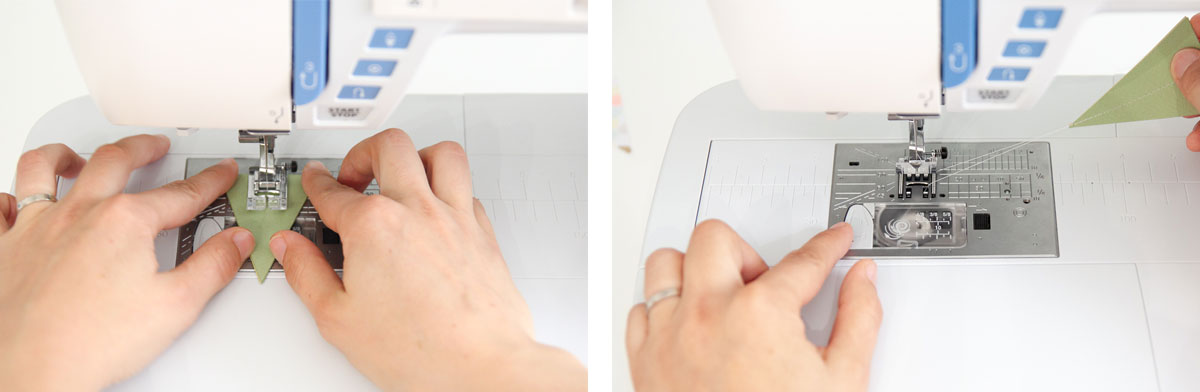
Stack three triangles together and begin sewing through the middle of the stack using your normal straight stitch. We recommend starting at the bottom of the triangle to avoid the tip getting stuck under the presser foot.
When you finish sewing through one stack, lift the presser foot and gently pull the tree backward. Do this slowly until you have about 4 inches of thread between the needle and the finished tree. Now place the second stack of triangles under the presser foot and repeat for the third tree.
Or, if you only need one tree on this garland, pull the thread some more, so you get the appropriate length.
You now have 5 garlands with mini paper trees.
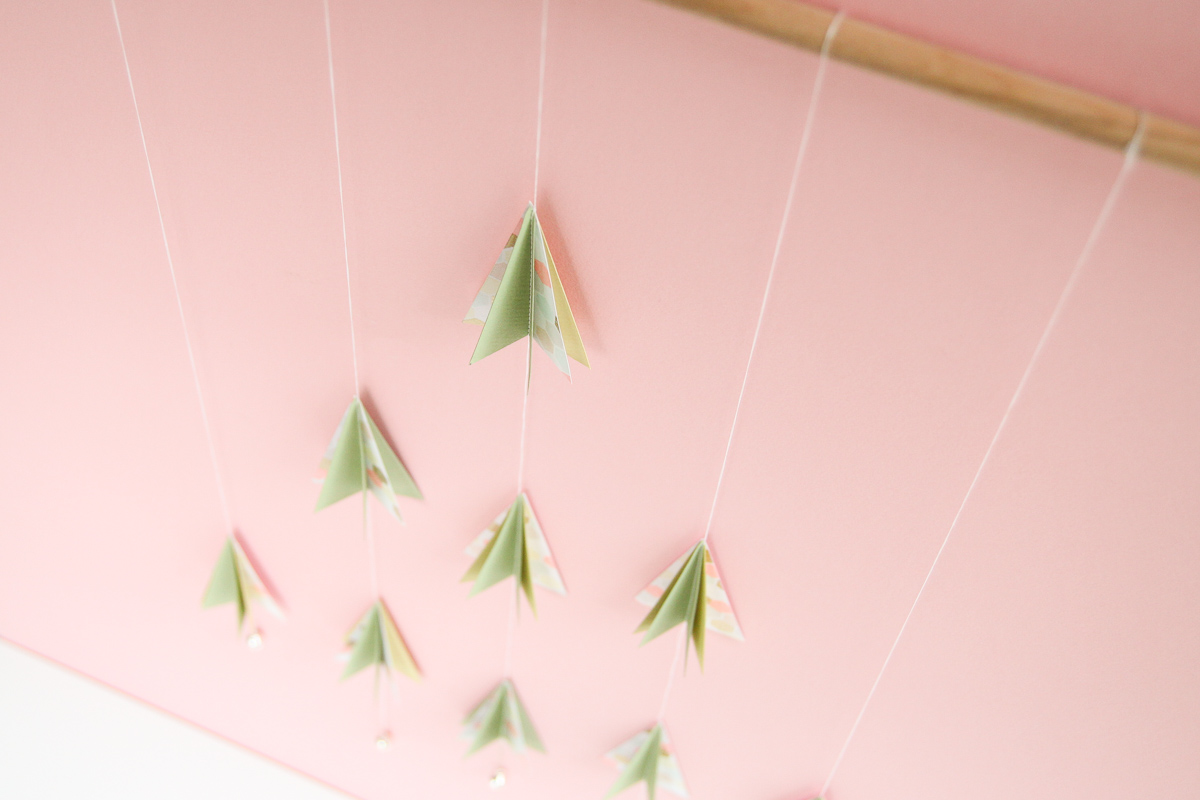
Third step: tie the garlands and finish the tree.
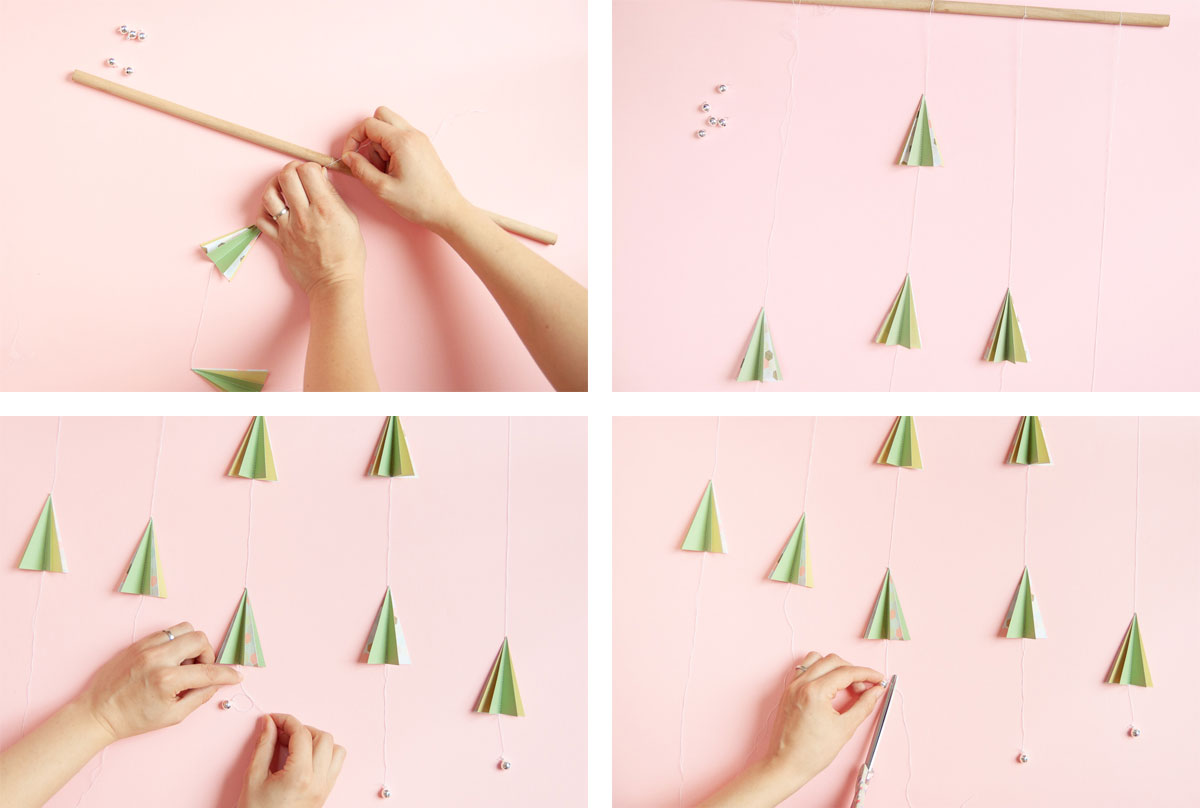
Tie your garlands to the wooden stick about 4 inches apart. To finish, tie your jingle bells at the bottoms of the threads at different heights to add some dimension.

And you are done. So where are you going to hang your tree?
Comments are closed.