
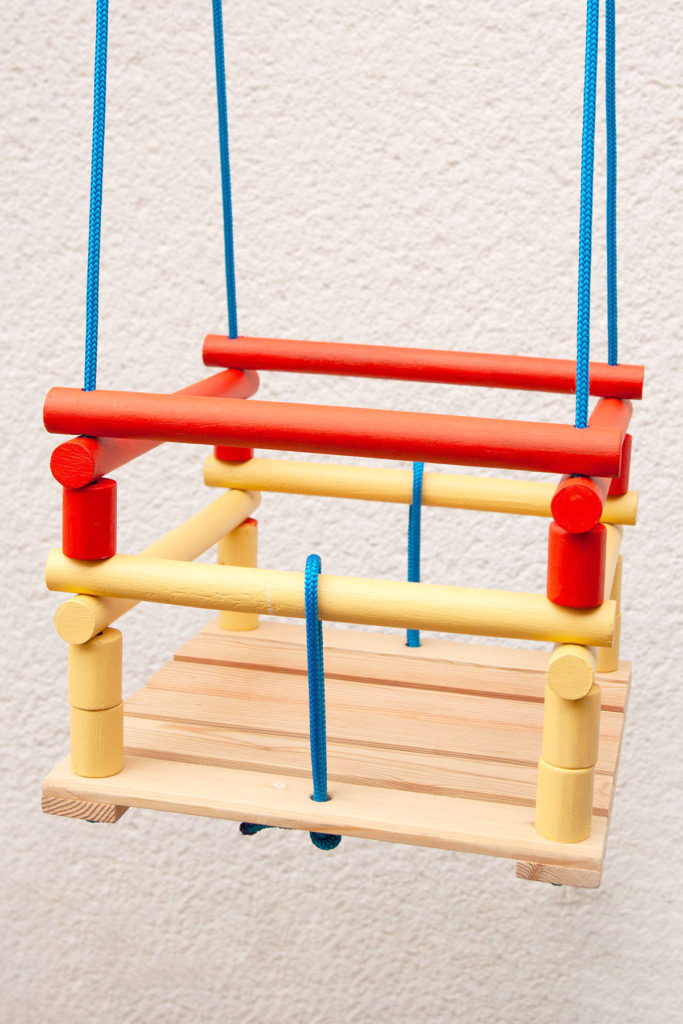
I had been planning to make a DIY wooden baby swing for years. I wanted to make it for my daughter when she was a baby, but kind of missed that train. Luckily for my baby boy, this spring we finally got around to making one. And let me tell you, he loves it!
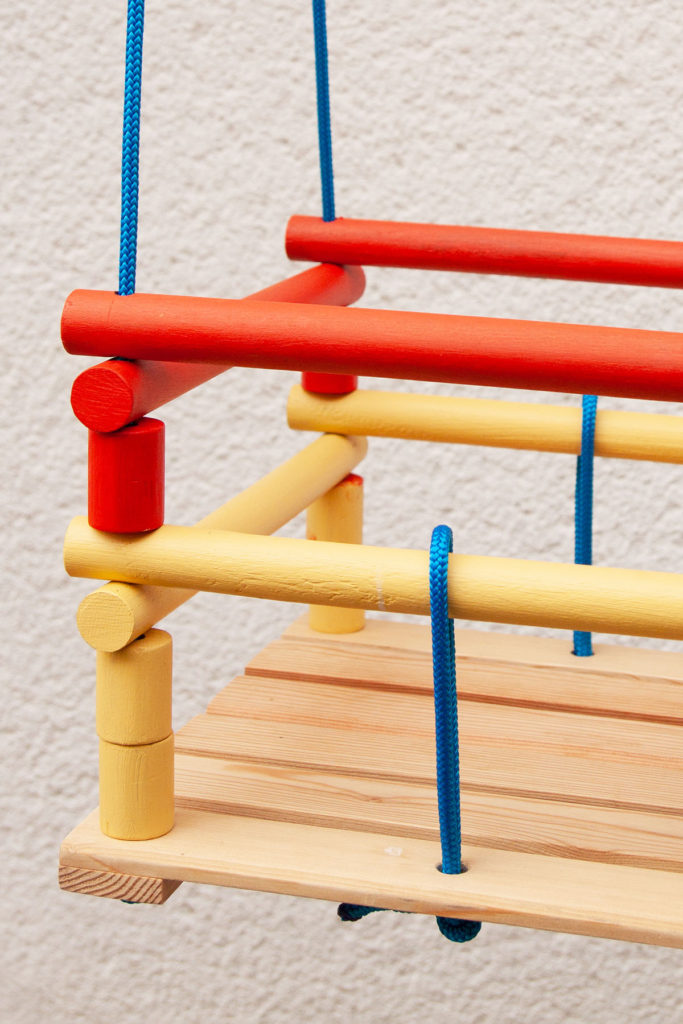
You could never tell by looking at it, that this wooden baby swing is actually made of scrap wood and old broomsticks. Now be honest, could you? For the base, we used some wooden slats that we had left over from a patio chair project from a couple of years ago. And for the frame to keep the baby safe we actually used three old broomsticks. There’s a saying here that everything comes in handy in seven years, and I guess this is proof of that.
You obviously don’t have to make your DIY wooden baby swing from scrap material.
Everything you need can be bought at any bigger hardware store. They would probably be willing to cut up the wooden pieces as well, so less work for you.
You will need some basic woodworking skills for this project. Or the help of someone who does.
But I’ll try to walk you through the steps so it’s not too complicated, ok?
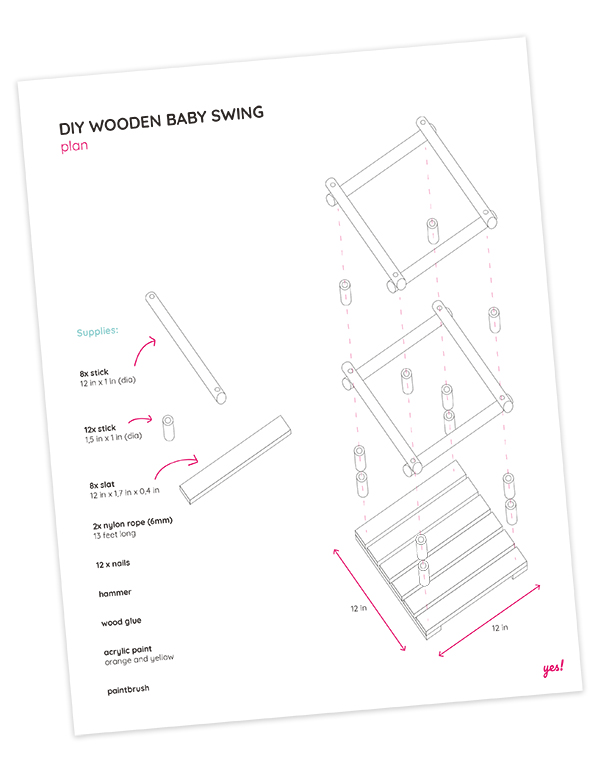
To make things a bit easier, we have made a PDF wooden baby swing plan. You can print it out and take it with you when you go get your supplies (or when you go cut your old broomsticks in the backyard). You can find the download instructions at the end of this article.
How to make DIY Wooden Baby Swing
![]()
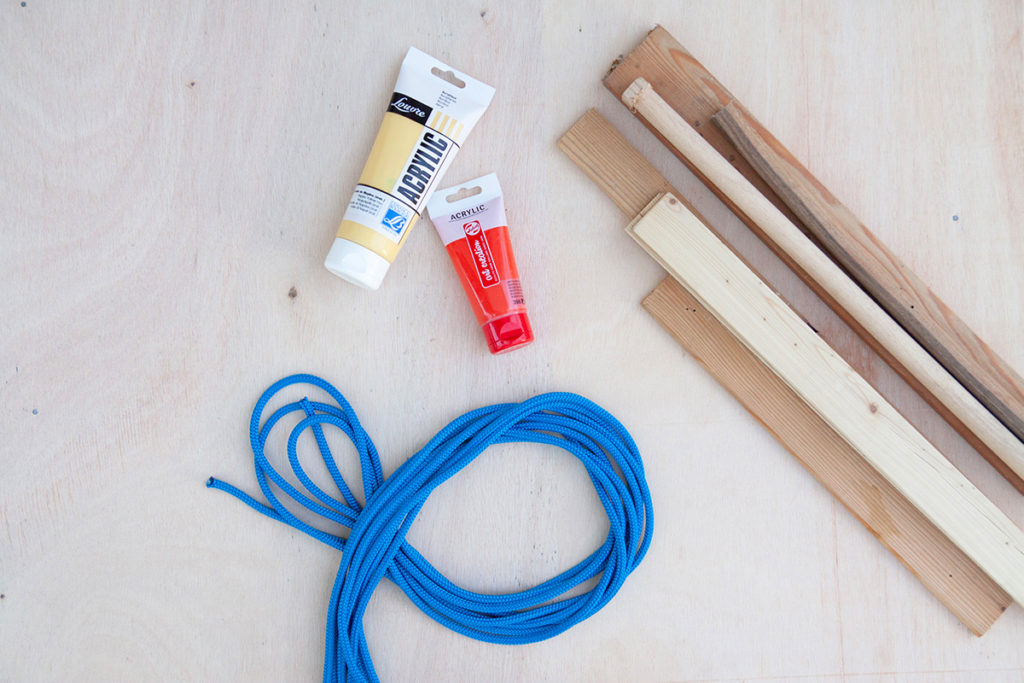
You will need:
- Our PDF wooden baby swing plan (to download it, follow instructions at the end of this article)
- Wooden slats and round wooden sticks (exact measurements in the PDF plan)
- Blue braided nylon rope (6 mm thick)
- Red and yellow acrylic paint
- Wood glue
- Nails
- Hammer
You will also need mounting hardware. The type depends on where exactly you plan to mount your swing, so please consult a salesman at the hardware store to make sure the swing is mounted safely.
We have included all of the exact measurements in the downloadable PDF. It’s free, so don’t forget to download it at the end of this article!
![]()
Let’s get to it, shall we?
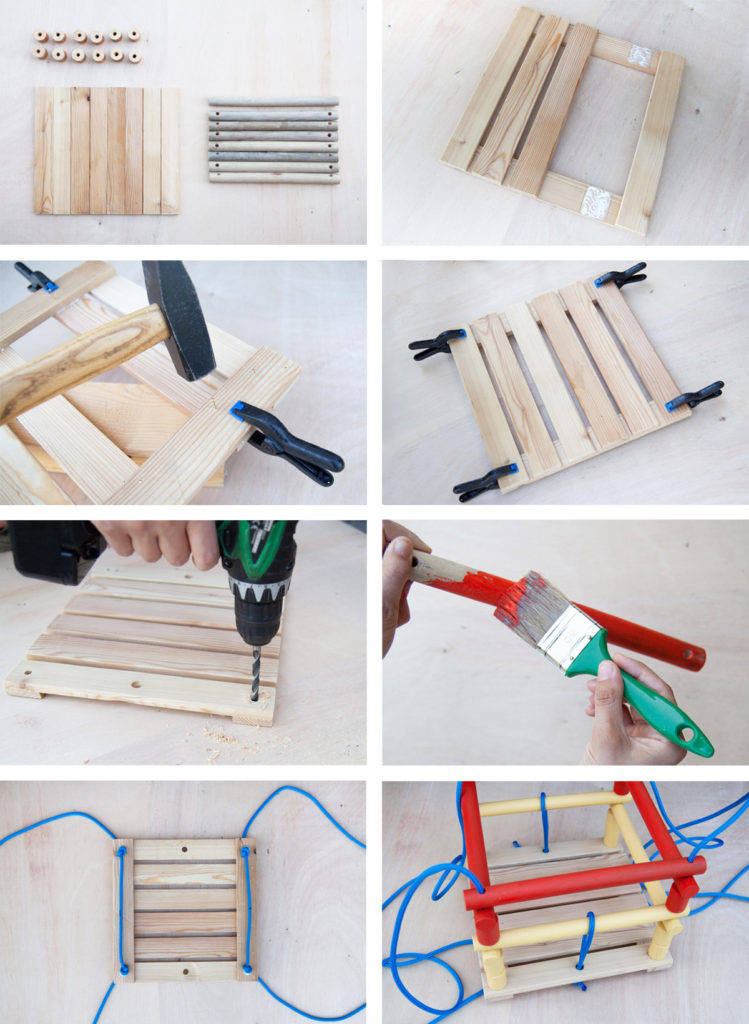
Step 1 Prepare your round stick pieces. Cut them to the proper sizes. Drill holes vertically through the shorter pieces. Drill holes at both ends of all of the longer pieces.
Step 2 Prepare your slats. Cut them to the proper sizes.
Step 3 Make the base. Following the drawing in the PDF, arrange the slats to form the base. Glue them together. Once the glue has dried, hammer the slats together. Finally, drill 4 holes at the corners of the base for the rope. Additionally, drill two holes at the center of the first and last slat.
Step 4 aka the fun part. Color your swing. Apply two layers of the chosen paint. Let dry completely.
Step 5 aka the super fun part. Assemble the swing. You will need two pieces of rope (same length). Start from the bottom up. We suggest you make knots under the base of the swing to make sure the swing doesn’t slide forward and backward along the rope. Then move upwards. This is kind of hard to explain but is really easy if you just look at a picture of the finished swing.
Step 6 Mount your swing. This step really depends on where exactly your swing will go. Please use a suitable mounting kit and make sure the swing is mounted properly for safe use.
![]()
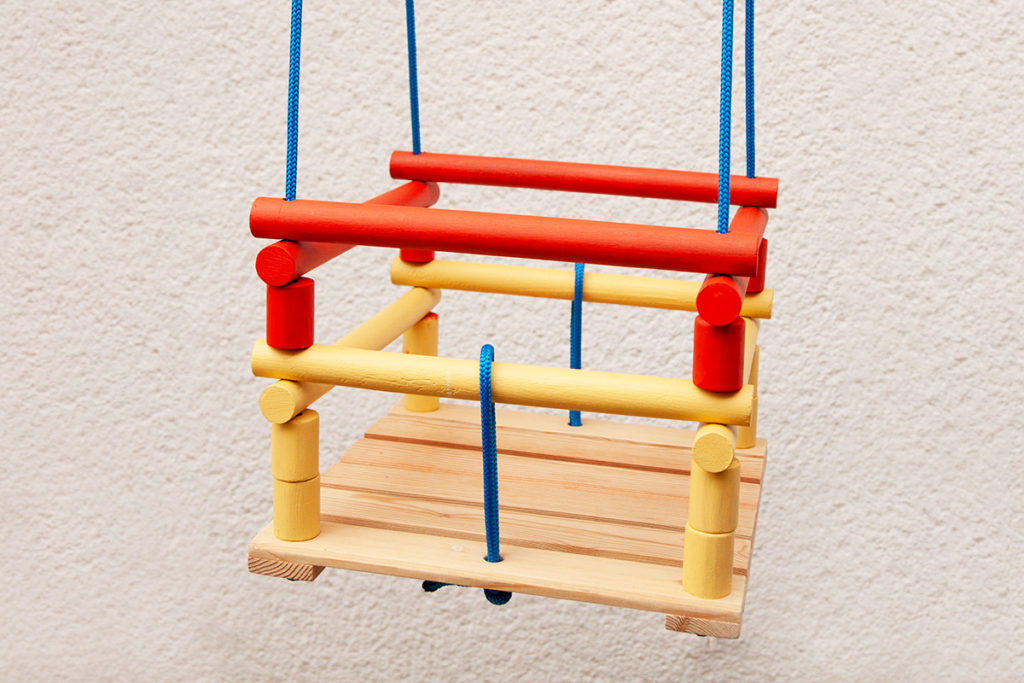
Voila! So stinking cute, right? The baby looooves it. And so do I, because it gives me the chance to drink my coffee in peace while my boy swings happily back and forth.

Download our free
DIY Wooden Baby Swing plan.
Fill out the form below to get the download link.
Comments are closed.