
I love sending handmade Christmas cards. I just think it shows your family and friends you have put some extra time and effort into wishing them happy holidays. Also, after years of making Christmas cards, I think the people on our list kind of got used to getting something special.
So I try to do something original each year. But since having kids this has been a challenge. I want to include my daughter in this little card-making tradition, so I have to think of something simple. Something a 2-year old can do.
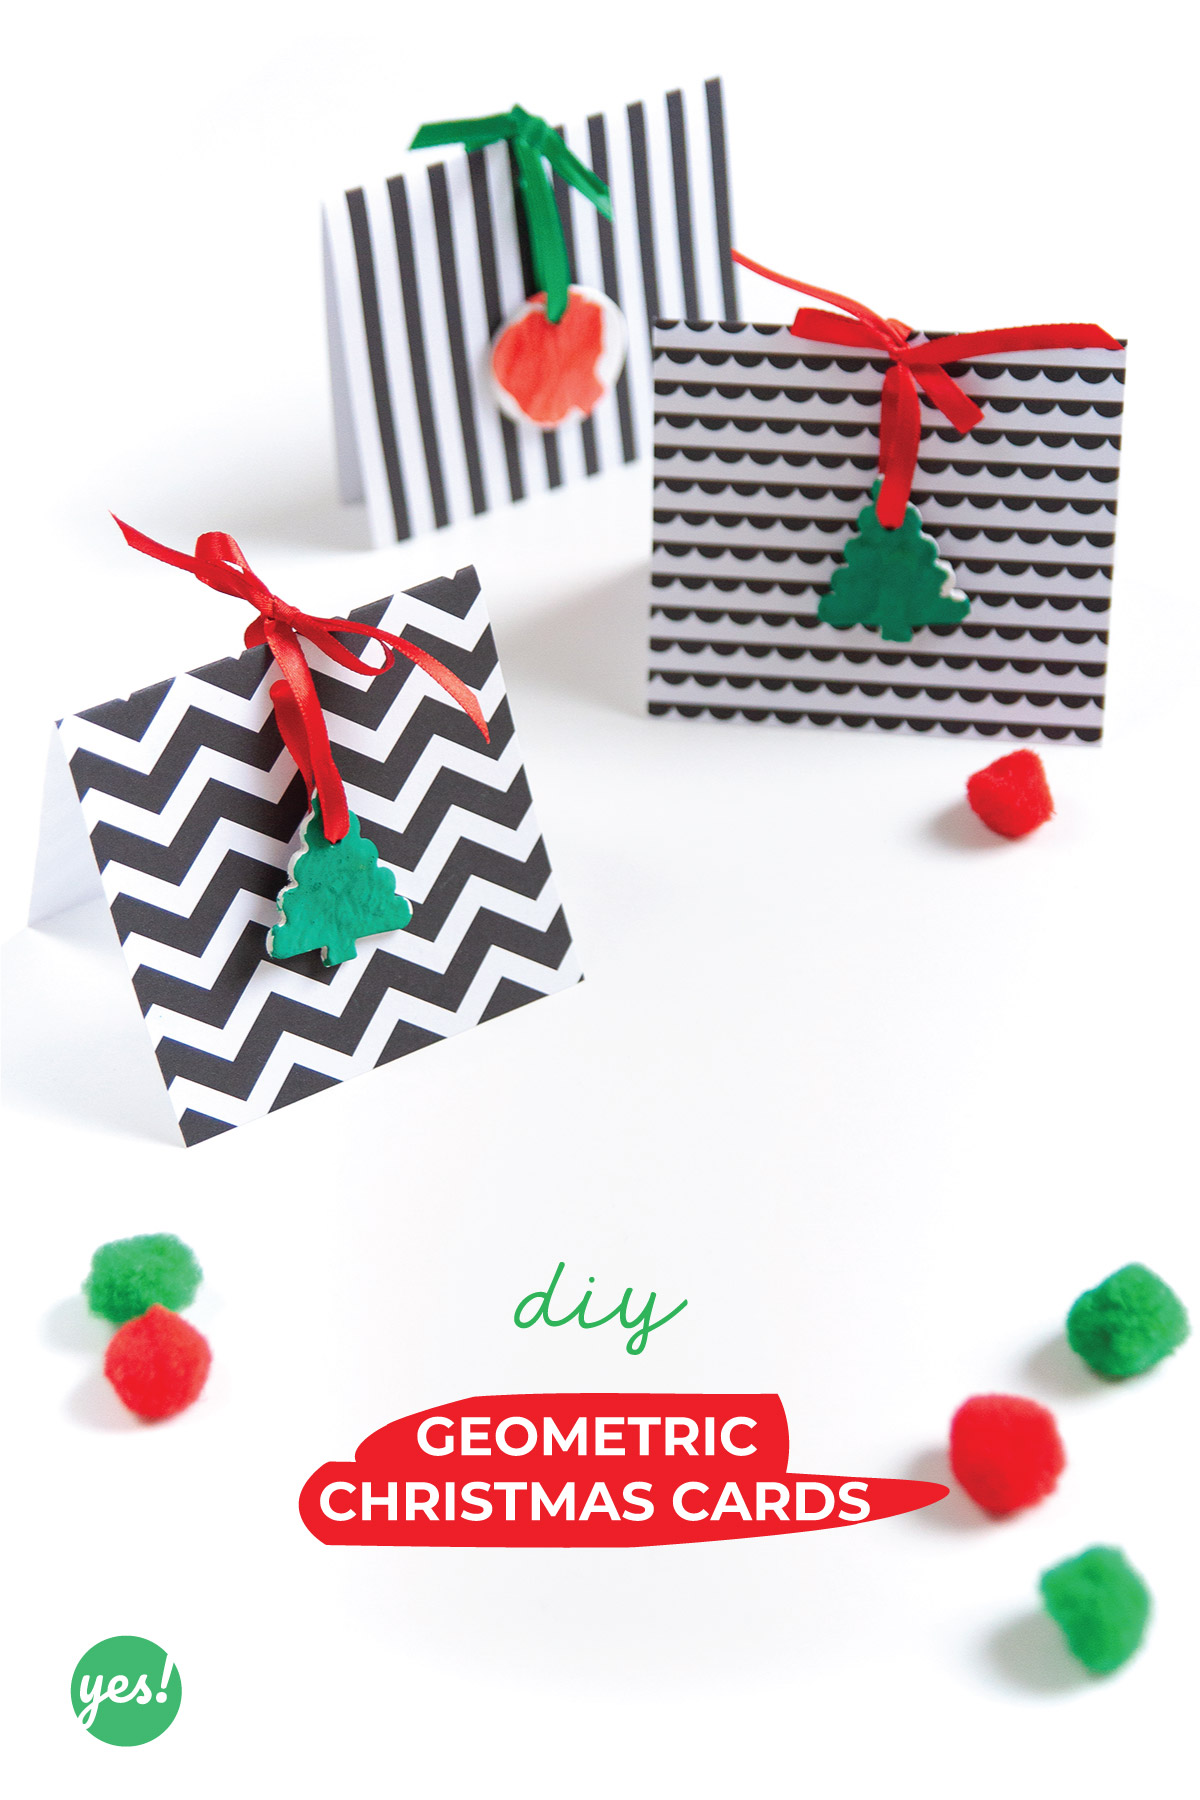
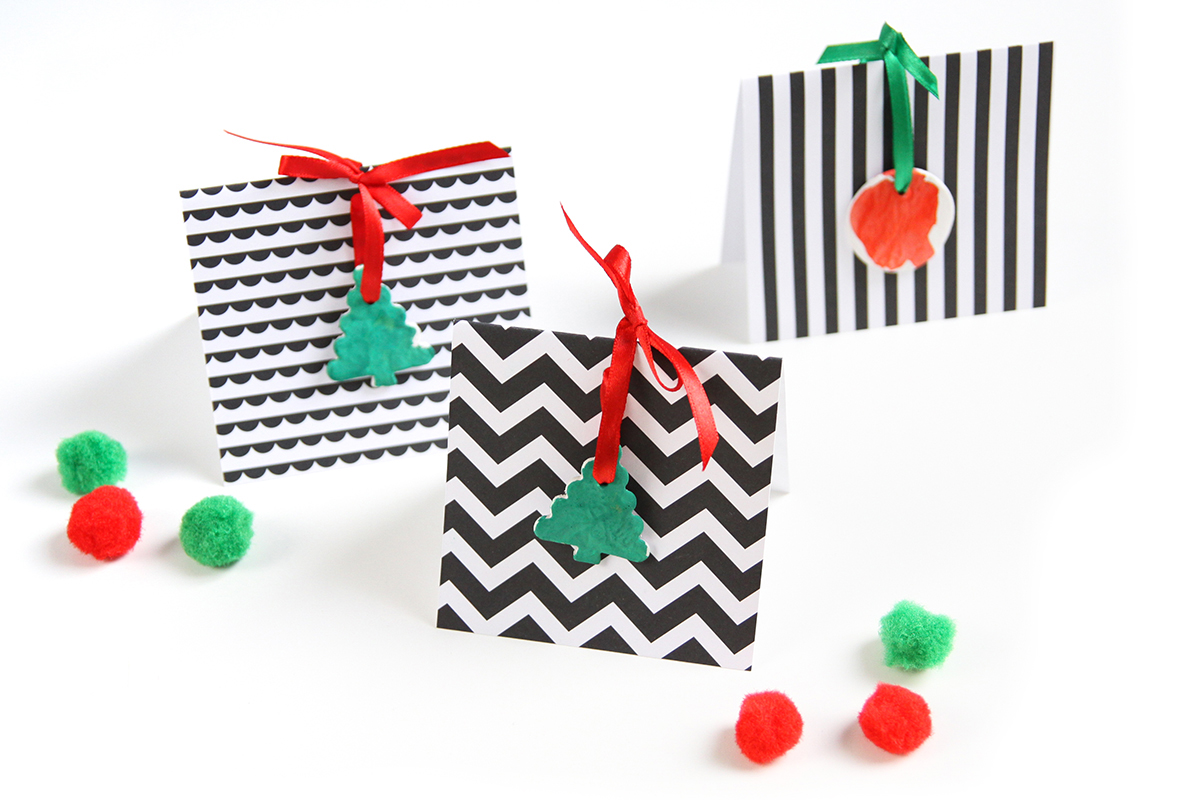
These geometric Christmas cards are what I’ve come up with this year. I think the fact that a 2-year old can do this – well, at least help – is proof enough these are super easy to make.
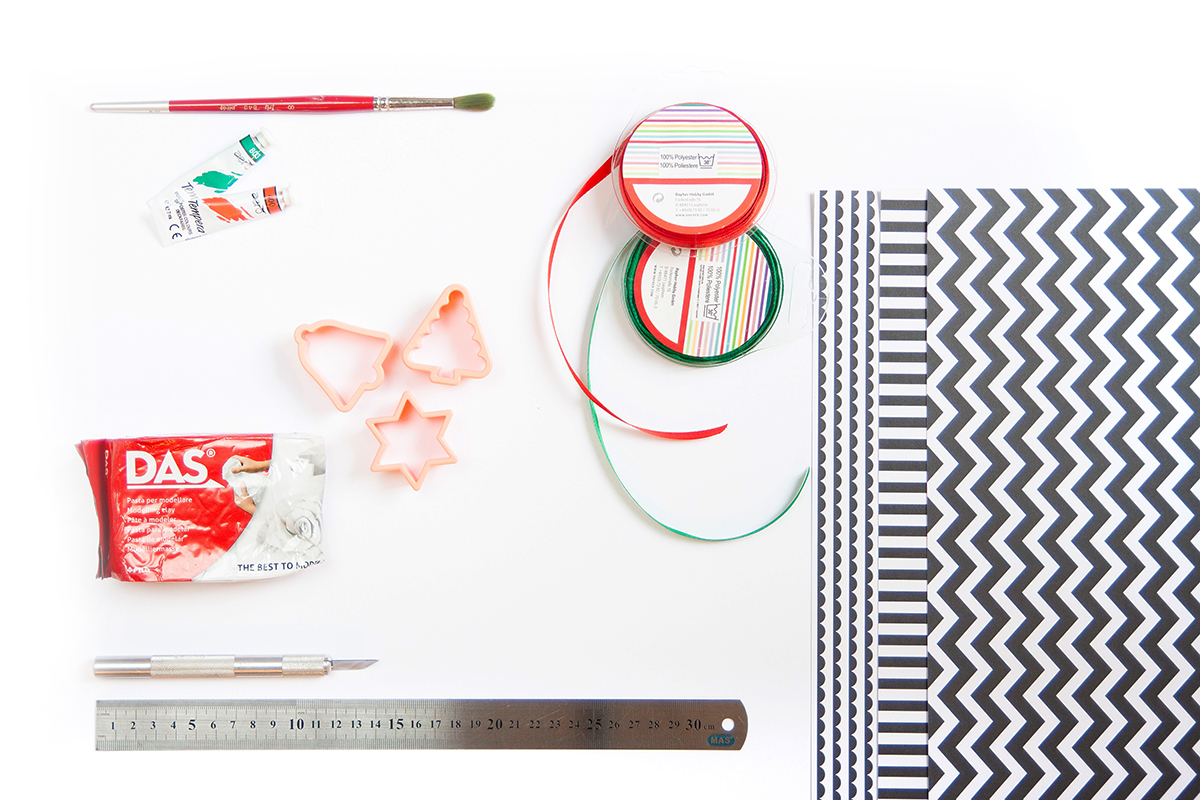
You also won’t need any special supplies. Apart from white modeling clay, which you can get at any craft store or online, you probably already have everything you need at home.

To make your geometric Christmas cards you will need:
- white modeling clay (we used Das modeling clay)
- Christmas cookie cutters
- red and green tempera paint (acrylic or good quality watercolor paint should do, as well)
- a brush
- black and white patterned cardstock
- an X-Acto knife and a ruler
- a hole punch
- red and green satin ribbons
Let’s make this!
Step 1: make the ornaments
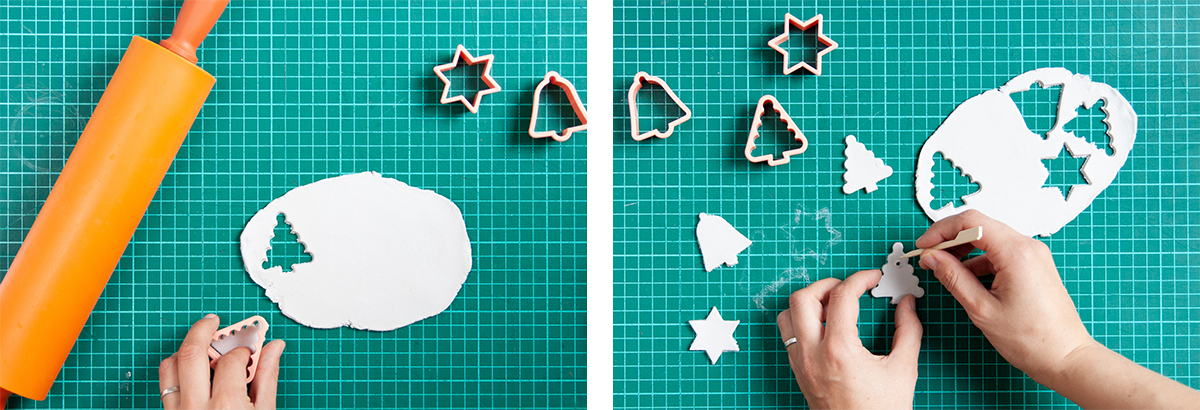
To make the ornaments you will pretty much do what you do when you make Christmas cookies. But instead of dough, you will use white modeling clay.
Take some of the white modeling clay and press it down with your fingers. Try to make it as even as possible, so the clay is spread out about 1/10 inch thick. You can also use a rolling pin for this if you like.
Now take your cookie cutters and cut out the shapes. Using a toothpick or something similar make holes to hang the ornaments.
Let the ornaments air dry. Follow the instructions on the modeling clay for this. We let ours dry for about 24 hours.
Once they have dried it is time to paint them. You don’t have to be super exact. I think leaving some areas of the ornaments unpainted adds some extra dimension.
Again, leave to dry. This should be quick, about an hour or so.
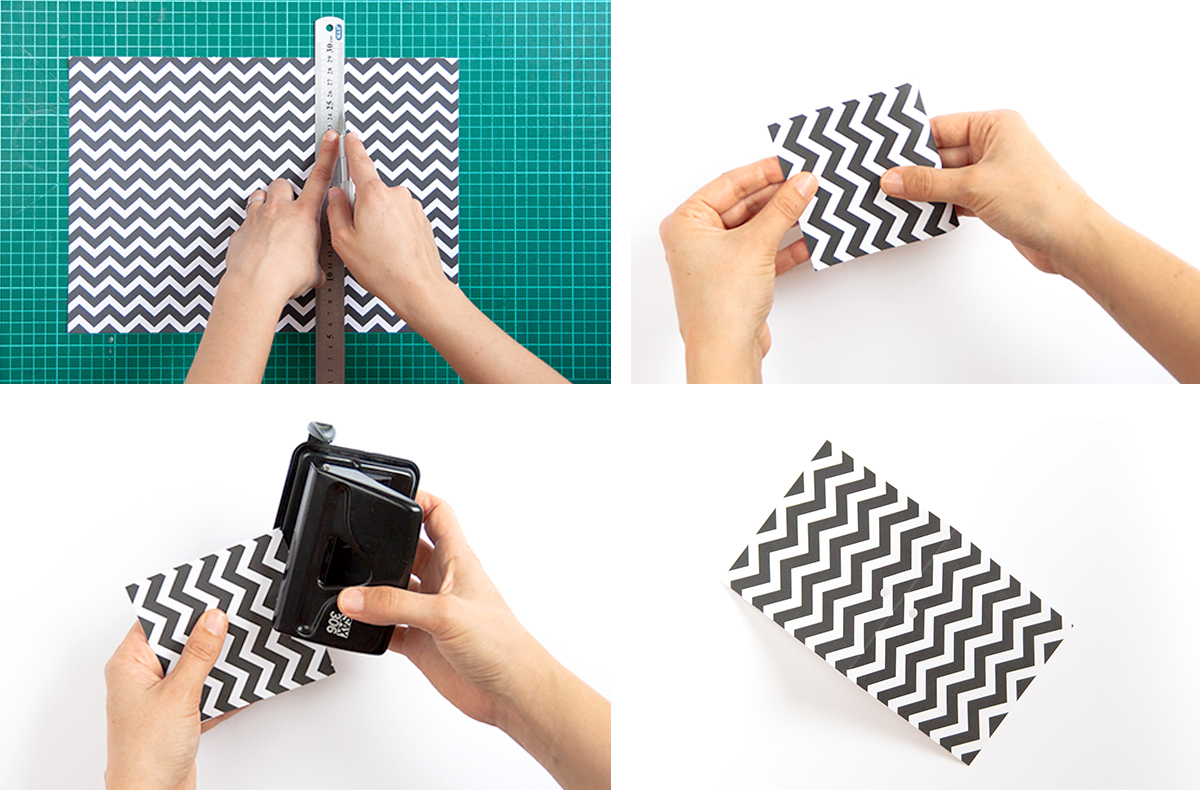
Step 2: cut out the cards
This is easy. Take your patterned cardboard and cut out the cards. We made ours 4×4-in when closed. This means we cut out a 4×8-in rectangle and folded it in half.
Take your hole puncher and make a hole about ⅓ of an inch below the center top of the folded card.
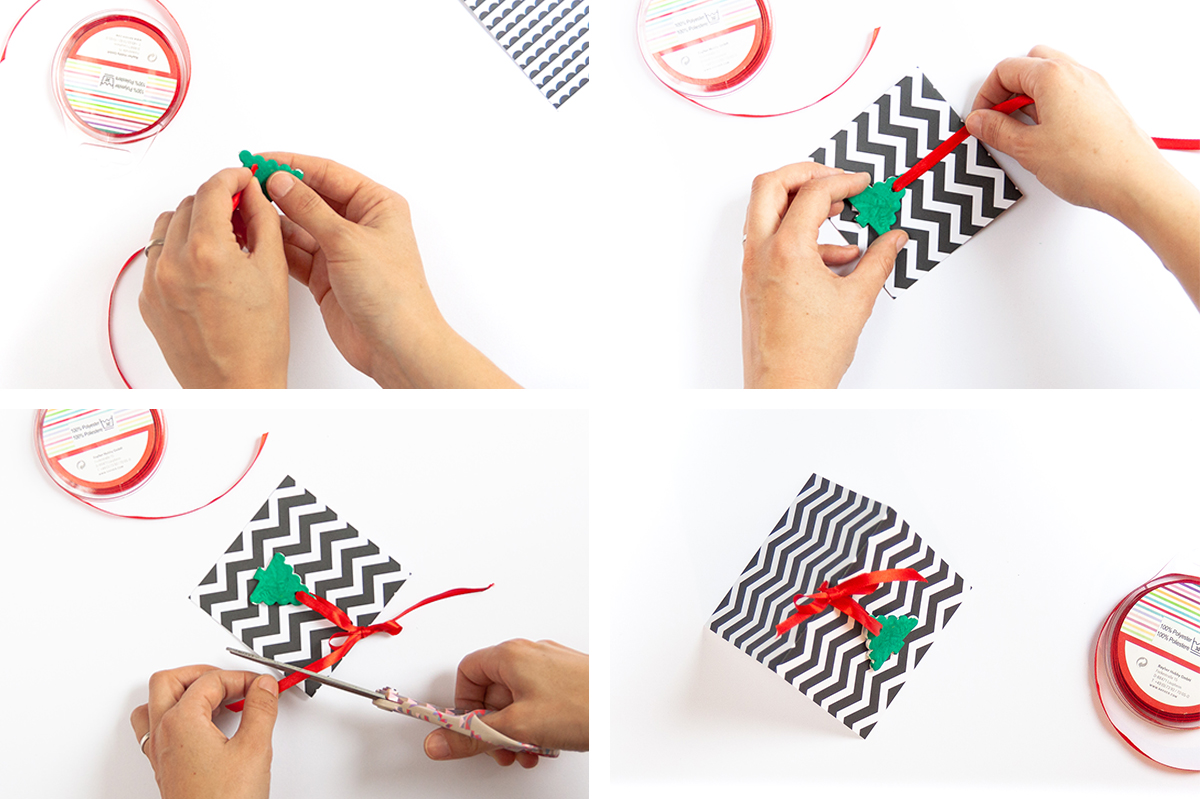
Step 3: put it all together
Cut your satin ribbon about 10 inches long. First, slip it through the hole in the ornament.
Then, with the ornament on the ribbon, slip it through the hole in the card. Make a lovely bow on top. Cut away any pieces of ribbon that might be too long and your geometric Christmas cards are done!
Now you just have to think of something lovely to write. Have a jolly card-writing time!
Comments are closed.