
We know it’s only February and Easter isn’t for another 7 weeks, but if you’re anything like us, it won’t be long till you start browsing Pinterest for Easter decoration ideas. You have to be prepared, right? Besides, nothing says spring like a cute Easter craft project. I don’t know about you, but we are more than ready for the winter to be over already!
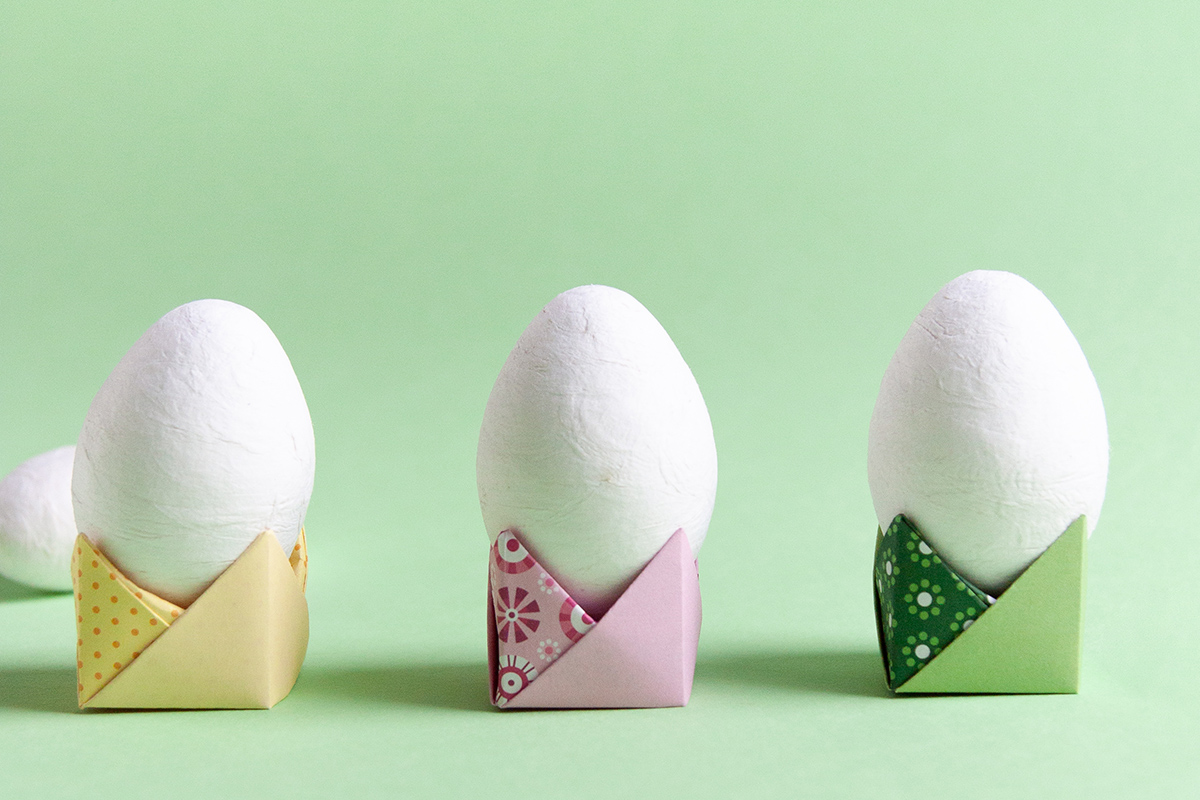
That is why today we are sharing a simple Easter tutorial for a cute origami Easter egg stand. You literally need one thing to make it – paper! It is, in fact, kind of magic (as are all origami projects). You wouldn’t believe you get such a great little holder out of a simple paper square, no glue or anything.
You can use any type of paper you like, but make sure it is not too thick, so you won’t have trouble folding it. Because there is quite a lot of folding, as you can imagine. We are all too ready for spring to come, so we opted for fresh spring patterns. But make yours in any style you like.
To make an origami Easter egg stand you will need a 5-inch (13 cm) square piece of paper. Both sides of the paper will be visible when you are finished, so how you start folding doesn’t really matter. It can look a bit complicated, so we tried to make it easier for you by drawing the instructions below.
Time to make your origami Easter egg stand!
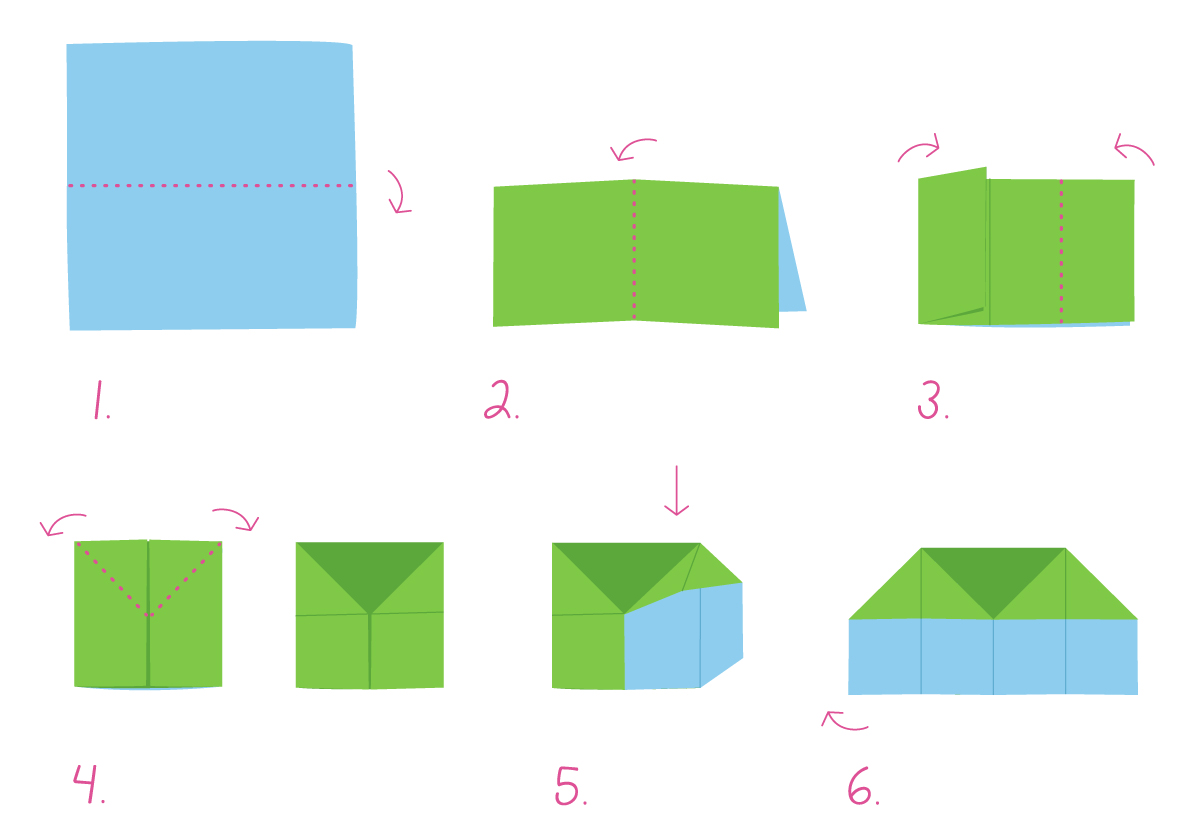
1 First, fold the square in half.
2 Fold in the other direction.
3 Keep the open side on the bottom. Fold the shorter side of the rectangle towards the middle. Repeat on the other side.
4 Make a dog ear fold outwards (on the upper, closed fold side). Repeat on the other side.
5 Unfold the dog ear fold and press it down so you get a ‘house’. Repeat on the other side.
6 Flip your paper over.
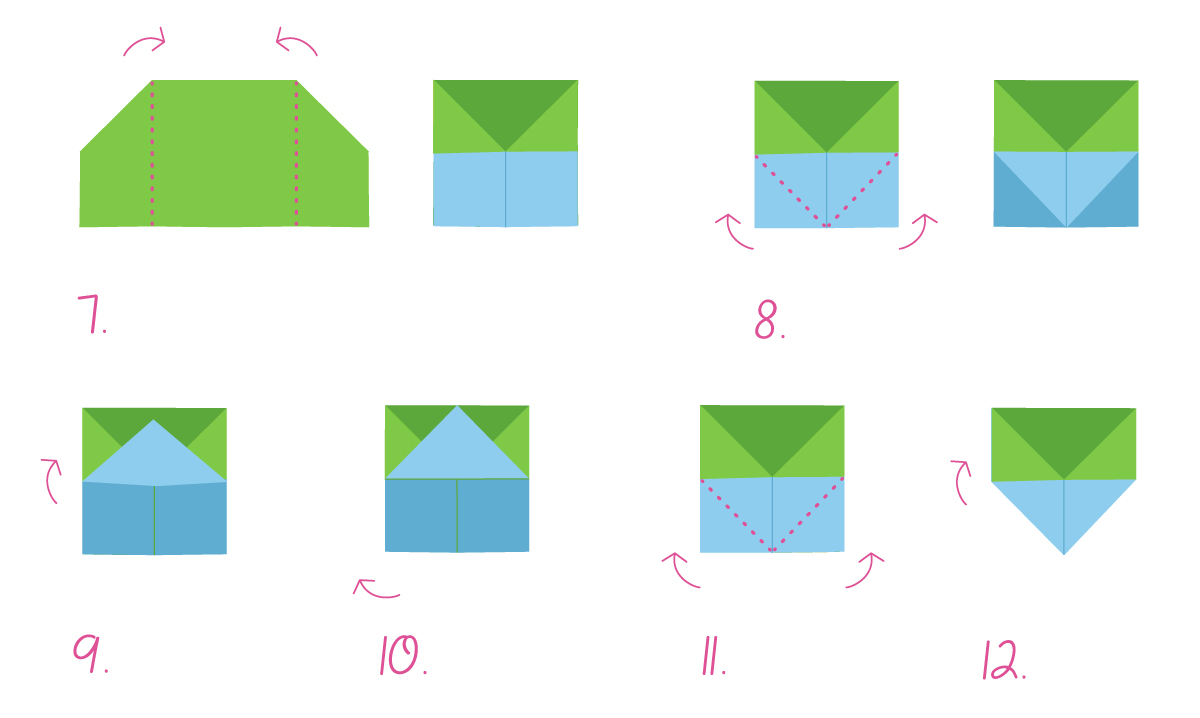
7 Fold the outer ‘quarter’ (not technically a quarter, we know) of the rectangle towards the middle. Repeat on the other side.
8 Make a dog ear fold inward (on the bottom side). Make sure you only grab the top two layers of the paper as you do this. Repeat on the other side.
9 Grab both dog ears, which now form a triangle, and fold the triangle upward.
10 Flip your paper over.
11 Repeat step 8: Make a dog ear fold inward (on the bottom side). Make sure you only grab the top two layers of the paper as you do this. Repeat on the other side.
12 Repeat step 9: Grab both dog ears, which now form a triangle, and fold the triangle upward.
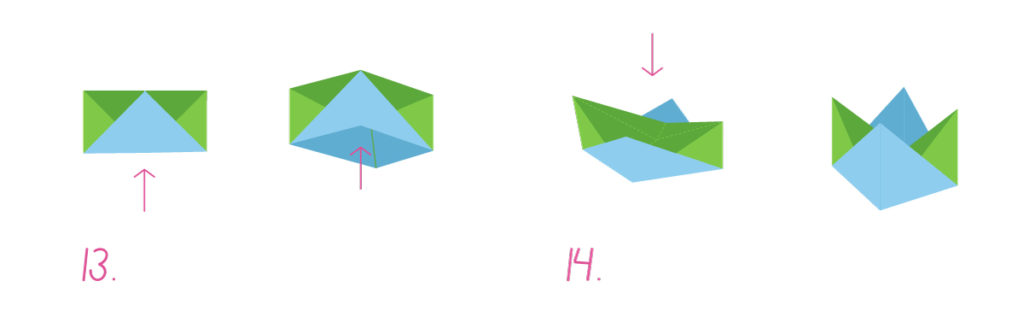
13 Now gently open up the bottom.
14 As you pull out, a little ‘cushion’ will form inside the holder. Press it down gently to form the bowl where the egg will sit.
This is it! What do you think? It wasn’t that hard right? We hope you love this origami Easter egg stand idea as much as we do. And if you have any trouble folding, please let us know. We would love to help!